Sunday, March 31, 2013

7.365 Washi Tapes - DIY Card Using Letter Block

Text and Images by Poppy Seed.

Washi Tapes VS Letter Block Card


A is for the Apple in my eye
B is for the Bestest friend I see
C is Cheeky cheesy extraordinary
D is even more than any Deer I have met and....  (sing with the tune of 'LOVE' by Nat King Cole)

So what does each alphabet mean to you?

Echoing PY's previous blog post, Easter is here!
I have crafted two alphabet cards to my dear friends to celebrate this joyous occasion.

I personally think that G and are for Easter.

G is for Grace, the kindness of God.
Ephesian 2:4-2:8- But God being rich in mercy, because of His great love, even while we were dead in sin, he made us alive together with Christ. By grace, you have been saved through faith.


P is for Peace. 
John 14:27- "Peace I leave with you; my peace I give to you. Not as the world gives do I give to you. Let not your hearts be troubled, neither let them be afraid." Jesus said to his disciples before he was going to the Cross. 


Please continue reading if you would like to join me in the fun of crafting.

Material needed:
  • Letter block
  • Colte Washi Tape
  • Paper
  • Scissor
  • Colour Pencil

Step by step, one two three:
  1. Decorate the letter block using Colte Washi Tape. Kindly refer to the figures above.
  2. Cut off the excessive edge
  3. Complete the word by writing the remaining alphabets on a small card. Colour it.
  4. Write your message at the back of the card.
  5. Stick the card on the letter block.

I hope you enjoy this. Do drop me a message and tell me your thoughts =)

The End~


Thursday, March 28, 2013

Easter is just around the corner!

Text by PY. Images sourced by PY (see link)


Easter is a festival for Christians to celebrate the resurrection of Jesus Christ. For non Christians, this is the day where you can show your respects to your Christian friend's faith. Or even join them to decorate some easter eggs. (Respect one another, that's what we shall do and teach our children. Right?) 

My sister and some of my dear friends are Christians. I wonder if they decorate any easter eggs or hunt any eggs at their backyard. 

There are some very pretty and interesting easter eggs that i found across the internet and I would like to share with you here.


(2) via Oh Happy Day


(3) via SheKnows


(4) via Momstatic
(5) via See Jane Blog
Most eggs shown in the pictures above are the ones with snowy white shell. For Malaysian, it is easier to find the brown shell eggs. I would love to try the "Simple Hand Drawn Easter Eggs" from Confetti Sunshine this weekend but i wonder if it will have the same effect on the brown eggs.
What about you? Does Easter mean anything to you? Or it is just another lazy Sunday? If you are interested to decorate some eggs for fun, which one would you like to try? ^u^


Thursday, March 21, 2013

Craft the Love for Home - Furniture Make Over


Text and Images by Poppy Seed. 

Furniture Make Over


Are you throwing away any old wooden furniture? Why not turn those junks into a royal piece?
Looking at the afternoon sunlight shining on the field, I decided to take out a few brushes, some old and dull looking furniture and my magic turquoise paint for the furniture make over.


Turquoise is a royal colour, named for the gemstone. It could magically add so much energy and light to a space. But be careful, not every colour matches turquoise. If your living room or kitchen is mainly beige or white, then it could go well with paler turquoise while the darker turquoise matches well with brown.


The pictures below show what's BEFORE and AFTER the furniture make over.


1.     Coffee table


BEFORE


AFTER


2.     Lamp stand round table


BEFORE


AFTER


    3. Mirror


    BEFORE


    AFTER


    Material needed:

    • Turquoise paint (You could either use water or oil based paint. I generally prefer water based paint because it dries faster and it is easier to clean up)
    •  Brushes (Get a few sizes so that you can use a big brush for a larger surface area and vice versa)
    • Sand paper
    •  Rug
    • Thinner (if you are using oil based paint)
    • Wax polish in dark oak colour (Optional for distressing)


    Step by step, one two three:


    Step 1:
    Use a damp rug to wipe off the dust on the furniture surface

    Step 2:
    Use sand paper to smoothen the surface

    Step 3:
    Starts painting. Tips: Follow the contour of the wood as you paint.

    Step 4: (Optional for distressing. Distressing means creating a vintage or aging look)
    For the mirror frame, after Step 3, I brushed one thin layer of wax for distressing.


    Step 5: (Optional for distressing):
    Wait until it is half dry, I then use a clean rug to press against/buff the surface to create the natural aging appearance.


    Step 6:

    The hardest step of all- waiting.
    It takes 3-4 days for the paint to dry completely.  So in the meanwhile sit back, relax and enjoy gazing at your master piece.


    The End~


    Written by: POPPY SEED
    Photographed by: POPPY SEED

    Wednesday, March 20, 2013

    6.365 Washi Tapes - Wall Art

    By PY.


    Poppy Seed wrote about how to create your unique piece of wall art last Wednesday.
    It was pretty and fun and so Poppy Seed! ^u^
    Such personalized craft just reflects exactly the character of the creator.

    I enjoy crafting, especially those "Quick and no Fuss" craft.
    And I believe that having children engage in simple projects (crafting, scribbling, general motor skill stimulation activities, etc) will encourage their creativity and imagination.

    Largest painting "The Lady with Floral Basket" with white picture frame is a gift from my mother in law. The smallest floral post card is by Taiwanese illustrator, Milly. The 3 hand paintings are part of Baby G's artworks in 2012. I laminated her work prior to stick them on the wall. This can help to preserve her works. 


    To show Baby G how much i appreciate her works, i display them on the wall with Colte washi tapes. Such tapes are toxic free and they are adhesive enough to stick and yet gentle enough to not damage your wall. Baby G's works can now be properly "framed" and changed for display when she has new artwork.

    After i upload the picture, i realized that "The Lady with Floral Basket" is not straighten. Oh well.


    Postcard by Milly + Colte Washi Tapes


    While i was trying to capture the picture with my iPhone, Baby G was there to imitate. (Don't worry, the Iphone in her hand is a broken unit where you cannot make phone calls or get online. She was only using it to capture picture. )


    Washi tape craft is fun and easy. Let's use it to celebrate and embrace our children's achievements. Cheers!


    Monday, March 18, 2013

    5.365 Washi Tapes - Access Card Needs a Face Lift

    Text and Images by PY.


    5.365 Washi Tapes Save the Poor Old Card

    >.<

    Colte Washi Tapes Come to the RESCUE!


    Work In Progress


    What a lovely card!!


    Sunday, March 17, 2013

    4.365 Washi Tapes - Handy Packaging

    Text and Images by June Chan.


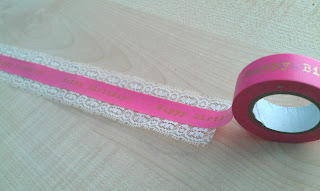
    What so nice about Washi Tapes is that it's not only sealing up the package, it is also glimmering your present with various pattern of Washi tapes and it's easy to open too. Sometimes when you in a mood of giving present to someone and when you grab a little special things in the market which is very nice but it sell in no packaging box, just simply use your creativity to decorate your present with different color and patterns of Washi tapes. It turn even better if you decorate it with others accessories. I've try it with some awesome vintage look lace ribbon in my first project.


    I just like the combination of the color


    A simple material list: Lace ribbon, glassin paper bag and Colte Washi Tapes. The glassin paper bag can get from daiso or it can replace by brown color envelolpe. 


    Cut the lace ribbon according to the length of your present. Snow white is the original color of this lace ribbon, in order to make it have some vintage look we D.I.Y it with tea bag


    Pick your favorite Washi Tape and just tape it on the center of the lace ribbon.


    Make a round with the lace ribbon and tide it well, just tape the end of Washi tape at the beginning.


    Choose a plain color Washi tape, so that it match perfectly when it's overlap with the gold color words printing washi tape. And it looks more outstanding when using different width of Washi Tapes.

                                           
    Finish. With just simple 3 steps and simple materials could give your present a different handy look.


    Tuesday, March 12, 2013

    3.365 Washi Tapes - DIY Art Work

    Text and Images by Poppy Seed.

    Washi Tapes VS Painting


    Are you scratching your head trying to find a suitable artwork for your living room or bedroom? Well, at least I am. It isn't easy to find one that is beautiful, affordable and non commercialise. It is even harder to find one that can fit in with the rest of the interior design. 
    So, why not DIY one for yourself?


    Material needed: 
    1. Photo Frame
    2. Paper
    3. Colour pencils and pens
    4. Washi tapes


    I would like to make a painting for the guest room. The room is painted in peach and there is a polka dot curtain hanging on the window. Having this in mind, let's start the DIY session.


    Step One: Select a photo frame
    I selected a plain white photo frame to match with the peach wall. It looks simple and clean.


    Step Two: Cut out a paper that suits the frame size
    In order to match the painting with the wall and yet letting it to stand out from the frame,  I selected a brown coloured paper instead of a white one.


    Step Three: Use Washi tape to create the border
    I chose a colourful and vintage looking Washi Tape to brighten up the room.


    Step Four: Design the content
    Since I am making the painting for our (my husbands's and my) guests, so I decided to write them something, "We are pleased to welcome you to our little polka dot cottage. Be our guest"
    I played around with different fonts and sizes so to make the wording looks interesting.


    Step Five: Colouring
    My favourite colours of this season? White, pink and turquoise!


    Step Six: Framing
    Frame it up, and mission accomplished!
    My hubby loves it, and I hope you'd like it too. :)


    Wednesday, March 6, 2013

    1.365 Washi Tapes - Potty Training Kit

    Text and Images by PY.


    #365 Washi Tapes

    Basically this is going to be a washi tapes mini project. 

    We are totally inspired by +Sarah Jane @ Sarah Jane Studios. As she was motivated by other bloggers who started #365 Pattern Project and #365 Sketch Project, she started her #365 Drawings. Aren't they super talented!?


    1.365 Washi Tapes


    Some toddlers kiss goodbye to potty training in a wink. They just master the art of poo poo and pee pee without a fight. 

    Some toddlers take longer time to be diaper free. Some even develop a phobia to go to toilet. 

    While each parent approach potty training differently, we would like to share an idea that could make potty training a little more fun. 

    Material
    Colte Washi Tapes (pallet series - code: CP 011, yellow.)
                                   (kids series - code: CK 007 or CK 009, animal themed.)
                                   You can get all Colte Washi Tapes from Checkpoint @ Sunway.
    Plain note book (the one in the picture is from MUJI Mid Valley)
    Sharpie
    Pen
    Color pencils
    Ruler (optional)
    Scissors (optional)

    This craft is so simple that you can create your own by looking at the pictures. Perfect craft for the busy parents. 

    Sharpie and washi tapes are needed for the cover. 


    Scissors are optional. You can easily tear off the washi tapes. 

    CK 007 (3 pieces in a roll) and CK 009 (3 pieces in a roll). Each roll consists of 12 meter tape. (20 mm x 12 meter)

    Layer an additional plain washi tape. 

    For a more refine look, you can cut the tape with scissors for straight edge.
    (you might notice that the animal themed washi tapes are different here. )


    Design the page with color pencils/pen/ruler/etc. 

    A closer look. 

    You can give your toddler a "sticker" (the animal themed washi tape) when she/he pee pee on the potty and give her/him 2 "stickers" when she/he poo poo on the potty. 

    You can even create a reward system based on this washi tape chart. For example, when your toddler shows improvement, you can read her/him an extra story before going to bed. Or an extra banana for snack time (if she/he is a fan of banana. Mine is.). 

    Be creative! And enjoy a little craft with your children. ^u^